

How to Clean Android Charger Port Safely: Do’s and Don’ts

You plug your phone in before bed… then wake up to 3%.
So you try another cable. Another charger. Another outlet. Maybe even press the charger upward at a weird angle hoping it suddenly works again.
Sometimes it does. Sometimes it doesn’t.
Before assuming your battery is damaged or your phone needs expensive repair, there’s a very common issue many users overlook, a clogged charging port.
Dust, lint, sand, and tiny fabric fibers slowly build up inside. When debris builds up, the charger suddenly feels loose, charging becomes inconsistent, or fast charging stops working entirely.
The good news? In many cases, a careful cleaning fixes the problem.
Today, we will talk about how to clean android charger port safely without damaging the tiny charging pins inside. Using the wrong tool or too much force can turn a simple lint problem into an expensive repair.
In this blog:
- Why Android Charging Ports Get Dirty So Easily
- USB-C vs Micro-USB: Why Cleaning Methods Matter
- Before You Clean: Is the Charging Port Actually the Problem?
- What NOT to Do When Cleaning Your Charging Port
- Safe Tools You Can Use to Clean an Android Charging Port
- Step-by-Step Guide: How to Clean Android Charger Port Safely
- How to Test If the Charging Port Is Clean
- How Often Should You Clean Your Charging Port?
- How to Prevent Future Charging Port Problems
- When Professional Repair Is the Better Option
-
Frequently Asked Questions
Let’s get started!
Why Android Charging Ports Get Dirty So Easily
Most Android phones use USB-C ports, which are small, deep, and constantly exposed to pocket lint and dust.
Every time you insert your charger, it pushes debris further inside the port. Over time, this debris becomes compacted and forms a solid layer that prevents proper connection between the cable and internal pins.
Environmental factors can also make buildup happen much faster. Charging ports usually collect dirt more quickly if you:
- Keep your phone in denim or lint-heavy pockets
- Work outdoors or in construction areas
- Frequently visit beaches or sandy environments
- Use your phone during workouts or at the gym
- Have pets around constantly
- Live in humid or dusty climates
Understanding this process explains why learning how to clean android charger port properly matters for long-term charging performance.
What Happens If You Ignore Charging Port Dirt Too Long?
Small charging problems can become larger hardware issues over time. Ignoring compacted debris may eventually cause:
- Permanent connector wear
- Charger tip damage
- Overheating
- Electrical arcing
- Unstable charging cycles
- Worn charging pins
Repeatedly forcing the charger into a blocked port also increases stress on the internal connectors. Regular cleaning helps prevent long-term damage.
USB-C vs Micro-USB: Why Cleaning Methods Matter
Not all Android charging ports are built the same way.
- USB-C ports are deeper and tend to trap compacted lint more easily. Fortunately, they’re usually more durable during cleaning.
- Older Micro-USB ports contain a fragile center tab that can bend or snap if too much pressure is applied.
If your phone uses Micro-USB, clean gently and avoid scraping against the center connector.
Before You Clean: Is the Charging Port Actually the Problem?
Not every charging issue means the port is dirty. Sometimes the charger, battery, software, or charging cable is responsible instead.
Checking the symptoms first helps avoid unnecessary cleaning or accidental damage.
Signs Your Android Charging Port Is Dirty
A dirty charging port usually causes connection problems that feel inconsistent rather than completely dead. Common signs include:
- The charger feels loose
- The cable no longer “clicks” securely
- Charging only works at certain angles
- The phone disconnects and reconnects repeatedly
- Android Auto or file transfer connections fail
- Charging becomes slower than usual
- Fast charging suddenly stops working
- Visible lint or dust appears inside the port
Many people notice the issue gradually getting worse over weeks or months before the phone stops charging reliably altogether.
Signs Cleaning Will NOT Fix the Problem
Before focusing entirely on how to clean android charger port safely, check the charging cable carefully too. Dirty or damaged cables can create almost identical symptoms.
Skip troubleshooting and seek professional diagnostic or repair services if you notice any of these warning signs:
- Physical Breakage: Internal connector pins are bent, flattened, or missing.
- Structural Looseness: The charging port wiggles or feels completely detached from the internal logic board.
- Total Unresponsiveness: The device completely fails to detect or respond to any functional charger, cable, or power outlet.
- Hardware and Liquid Errors: Persistent "moisture detected" or liquid warnings display on your screen even after the phone is entirely dry.
- Chemical Corrosion: Visible green, blue-grey, or powdery white crust forms on the copper contact pins inside the port.
- Thermal Damage: A distinct burnt smell or black scorch marks appear around the plastic housing of the port opening
If you notice these symptoms, skip DIY cleaning and have the phone inspected professionally.
What NOT to Do When Cleaning Your Charging Port
Many charging ports get damaged during cleaning attempts rather than from the dirt itself. Being too aggressive can bend delicate internal connectors permanently.
That is why learning how to clean charging port on android phone models carefully is so critical to avoid permanent damage.
1. Never Use Sharp Metal Tools Aggressively
Paperclips, sewing needles, safety pins, knives, and metal tweezers can scratch or bend the tiny charging contacts inside the port. Those connectors are extremely delicate. Even slight damage can cause:
- Intermittent charging
- Fast charging failure
- Loose connections
- Complete charging loss
Some repair technicians use precision metal tools carefully under magnification, but for most people, plastic or wooden tools are far safer.
2. Don’t Blow Into the Port With Your Mouth
Breath contains moisture and microscopic saliva particles. Blowing directly into the charging port can introduce humidity that slowly contributes to corrosion inside the connector. Compressed air is safer because it removes debris without adding moisture.
3. Avoid Household Rubbing Alcohol
- Never soak the port.
- Never pour liquid inside.
- Never clean while powered on.
4. Avoid Cotton Swabs
Regular cotton buds may leave tiny fibers inside the charging port. Those fibers can:
- Trap moisture
- Catch on charging pins
- Create additional buildup later
Foam swabs or lint-free electronics swabs are much safer alternatives.
5. Don’t Use High-Pressure Air Compressors
Industrial air compressors can damage charging pins or force debris deeper inside the phone. Even canned compressed air should be used carefully:
- Use short bursts only
- Keep slight distance from the port
- Hold the can upright
- Avoid prolonged spraying
6. Don’t Force Anything Inside
If debris feels stuck, avoid aggressive scraping. Pushing too hard may compact lint deeper or snap delicate pins inside the charging port.
Gentle cleaning is far more effective than forceful digging when figuring out how to clean charging port on android phone devices safely.
Safe Tools You Can Use to Clean an Android Charging Port
The safest tools are firm enough to remove lint but soft enough to avoid damaging connectors.
Recommended Cleaning Tools
- Flashlight
- Compressed air
- Wooden toothpick
- Plastic dental pick
- Plastic zip tie tip
- Electronics-safe soft brush
- Lint-free microfiber cloth
- 90%+ isopropyl alcohol (optional and minimal use only)
Plastic dental floss picks are popular because they’re thin enough to fit into USB-C ports without being overly sharp.
Wooden toothpicks sometimes:
- Break apart
- Leave splinters
- Compact lint deeper
- Create tiny fragments inside the port
Trimmed plastic zip ties also work well because they’re rigid but softer than metal. Before cleaning electronics, touching a metal surface briefly can help discharge static electricity from your hands.
Step-by-Step Guide: How to Clean Android Charger Port Safely
Most people can clean a charging port successfully in about 5–10 minutes. Take your time and work gently.
Step 1: Turn Off Your Phone. Power the phone off completely before cleaning to reduce the risk of electrical damage.
Step 2: Inspect the Port. Use a flashlight to check for lint, dust, or visible debris. If you notice bent pins, corrosion, or moisture, stop and seek professional repair.
Step 3: Use Compressed Air. Blow short bursts of compressed air into the port while holding the can upright and slightly away from the opening.
Step 4: Remove Compacted Lint. If debris remains, gently loosen it using:
- A wooden toothpick
- Plastic dental pick
- Trimmed plastic zip tie
- Anti-static electronics brush
Use slow scooping motions rather than pushing downward.
Step 5: Remove Remaining Debris. Pull loosened lint outward carefully. Repeat short air bursts if necessary.
Step 6: Optional Alcohol Cleaning. If sticky residue remains, lightly dampen a lint-free swab using 90%+ isopropyl alcohol. Avoid soaking the port and allow it to dry fully before charging.
How to Test If the Charging Port Is Clean
Once you finish cleaning, plug your charging cable back into the device to evaluate your work using two quick tests:
- The Click Test: A clean port allows the USB-C or Micro-USB header to seat deeply and lock firmly into place. If you feel or hear a distinct, secure "click" that was missing before, the blockage has been successfully removed.
- The Movement Test: While the phone is actively charging, gently wiggle the cable near the base of the port. If the charging indicator remains stable and does not flicker on and off, your internal pins are making perfect contact again.
If the cable still feels loose or the charging remains inconsistent after a thorough cleaning, the port may have structural hardware wear that requires a professional component replacement.
How Often Should You Clean Your Charging Port?
For most users, checking the charging port every one to two months is enough. You may need more frequent cleaning if:
- You work outdoors
- Your phone stays in pockets constantly
- You use the device in dusty environments
- You notice loose charger connections regularly
Routine maintenance helps prevent severe buildup from forming.
How to Prevent Future Charging Port Problems
Once you understand how to clean android charger port safely, preventing buildup becomes much easier.
- Keep the Phone Out of Dusty Pockets: Lint-heavy pockets are one of the biggest causes of charging port buildup. Loose fabric fibers gradually compress into the port every time the phone moves around.
- Consider USB-C Dust Covers: Small USB-C port plugs help block lint and debris from entering the charging slot. They’re especially useful for people who mostly use wireless charging.
- Clean Charging Cables Too: Dirty charging connectors can transfer grime back into the port repeatedly. Wipe cables occasionally using a dry microfiber cloth.
- Avoid Moisture Exposure: Humidity and moisture can mix with dust and create sticky residue inside the port. Keep the phone dry whenever possible. Learn more here: How to Get Water Out of Charging Port: Avoid These Mistakes!
When Professional Repair Is the Better Option
DIY cleaning is helpful for dirt buildup, but some issues require professional inspection. Repair shops can:
- Use magnification tools safel
- Inspect damaged charging pins
- Test internal charging circuits
- Replace worn ports properly
Seek professional help if:
- Charging still fails after cleaning
- The port feels loose internally
- The phone overheats while charging
- The battery swells
- Water damage occurred recently
- Sparks or burn smells appear
- The connector wiggles abnormally
Some manufacturers and repair shops even clean charging ports for free during inspections.
Frequently Asked Questions
Why is my Android charging port always getting dirty?
Charging ports collect lint and dust because they stay exposed whenever the phone sits inside pockets, bags, or dusty environments. Small fibers slowly compress deeper into the USB-C opening each time the device moves around. Over time, the buildup becomes dense enough to block the charger from connecting fully.
Is it safe to clean a phone charging port yourself?
Cleaning can be safe when done gently using non-metal tools and careful techniques. The biggest risk usually comes from using sharp objects or introducing moisture into the connector. Turning the phone off first and avoiding excessive force greatly reduces the chance of accidental damage.
Can I use a needle or paperclip to clean my charging port?
Metal tools carry a higher risk of scratching or bending the tiny charging pins inside the port. While some repair professionals use precision tools carefully, consumers are generally safer using plastic picks or wooden toothpicks instead. A damaged pin can create far more expensive problems than simple lint buildup.
What should I do if my phone still won’t charge after cleaning?
If cleaning doesn’t improve the issue, test different charging cables and adapters before assuming the phone is damaged. Persistent charging problems may indicate worn charging pins, battery issues, internal hardware faults, or moisture damage. In those situations, professional inspection is the safest next step.
Can I clean my charging port with alcohol?
High-concentration isopropyl alcohol can sometimes help remove sticky residue, but it must be used very carefully. Only a tiny amount should be applied using a lint-free swab, and the phone must remain powered off until everything dries completely. Excess liquid inside the port can damage internal electronics.
So, How to Clean Android Charger Port? A Quick Recap.
Most charging port problems happen because compacted lint, dust, or grime blocks the charger from connecting properly. Learning how to clean android charger port safely means using gentle tools, avoiding moisture and metal objects, and recognizing when the issue may actually be hardware damage instead of dirt buildup.
Key Takeaways
- Loose charger connections are often caused by compacted lint inside the port
- Plastic or wooden cleaning tools are safer than sharp metal objects
- Only use 90%+ electronics-safe isopropyl alcohol if absolutely necessary
- Fast charging problems can sometimes point to dirty charging contacts
- Burn marks, overheating, or loose ports should be inspected professionally
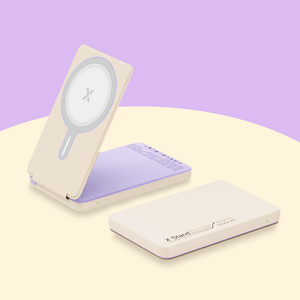
If you rely heavily on your phone throughout the day, knowing how to clean charging port on android phone devices is a great skill, but having reliable backup power can also reduce charging stress and constant cable use.
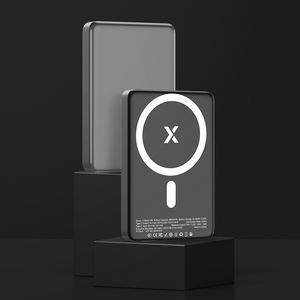
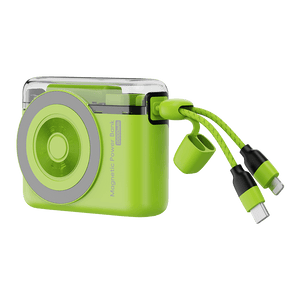
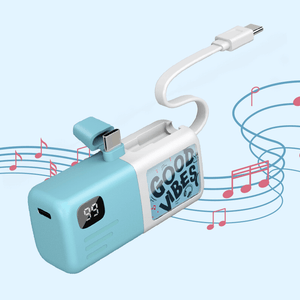
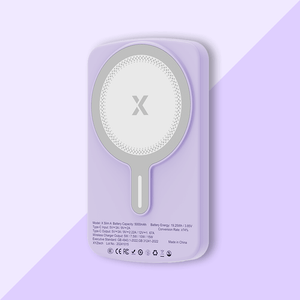
Our XYZtech power banks come in both 5,000mAh and 10,000mAh options, giving you convenient portable power whether you’re commuting, traveling, or spending long hours away from outlets.
Related Articles
How to Get Water Out of Charging Port: Avoid These Mistakes!
Guide to Different Types of Ports and Connectors: Plug It Right!
How to Clean Charging Port on Phone Safely: Step-by-Step Guide


